見つけました。
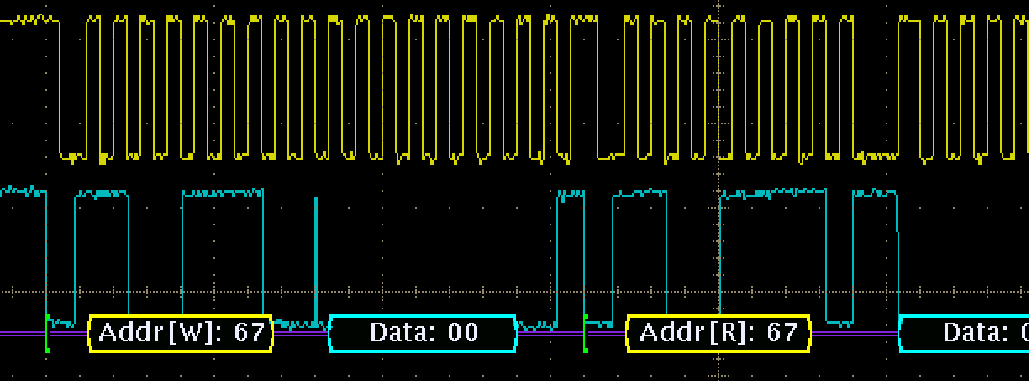
連続試験で不安定なのでオシロで波形やら見なければと。それとプルアップ抵抗など。いい記事です。多謝!
400KHzについてはこちらにいい記事あり(下記にコピーした記事あり)。

■I2Cの規格は厳密
I2CのStandard Modeでは、HighとLowの電圧規定は次のようになっています。Vdd=3.3Vとします(http://www.nxp.com/documents/user_manual/UM10204_JA.pdf)。
- VIL(Low Level Input Voltage) :-0.5V~0.99V(1.5V固定の例外もある)
- VIH(High Level Input Voltage):最小2.31V(3V固定の例外もある)
smbusでは少し異なります(http://pmbus.org/Assets/PDFS/Public/SMBus_3_0_20141220.pdf)。
- VIL:~0.8V
- VIH:1.35V~VDD
Raspberry PiにはI2Cバスにプルアップ抵抗1.8kΩが実装されています。8ビット・マイコンのサンプルでは10kΩが使われていたので、ずいぶん小さな抵抗値です。
●キャラクタLCDモジュールのAQM1602Aをつなぐ
ラズパイのI2CインターフェースにAQM1602Aをつなぎます。電源電圧は3.1~5.5Vなので、3.3Vで利用します。消費電力は3.3V時に1mAと省エネ・デバイスです。1行に16文字、2行の表示ができます。これは、前に使ったSO1602Aと同じ表示文字数です。
変換基板のI2Cラインにはプルアップ抵抗10kΩは実装されていますが、デフォルトではつながっていません。
●I2Cツールで接続を確認
| i2cdetect -y 1 |
何も表示されません。何十回か繰り返すと、3eの表示が出ることがあります。SDAラインがLowレベルを満たしていないため、簡易的に、2.2k~3kΩでGNDにプルダウンする対応策がネット上で紹介されています。3kΩをつなぐと、3eに存在することが確認できます。
Changing the default I2C bus speed on the Raspberry Pi can help improve the performance of some projects. This is particularly important when using the I2C interface to control a display module. In the newer versions of Raspbian this change must be made using a Device Tree parameter.
The bus speed is sometimes referred to as “baudrate” although the two aren’t actually the same thing.
Step 1 – Enable the I2C Interface
Before the interface baudrate can be changed the I2C interface must be enabled. This can be done using “raspi-config” on the command line or “Raspberry Pi Configuration” on the Raspbian desktop.
For step-by-step instructions on how to do this please take a look at the Enable I2C Interface on the Raspberry Pi post.
Step 2 – Edit Config.txt File to set I2C Bus Speed
Using the following command the config.txt file can be edited :
sudo nano /boot/config.txt
Find the line containing “dtparam=i2c_arm=on”.
Add “,i2c_arm_baudrate=400000” where 400000 is the new speed (400 Kbit/s). Note the comma.
This should give you a line looking like :
dtparam=i2c_arm=on,i2c_arm_baudrate=400000
This enables the bus and sets the baudrate at the same time with a comma separating both parameters.
Use CTRL-X, then Y, then RETURN to save the file and exit.
Step 3 – Reboot
Finally, reboot the Pi for the new setting to take effect :
sudo reboot
I2C Baudrate Values
The BCM2835 ARM Peripherals specification (page 28) says that the Pi has a “fast-mode” (400Kb/s) driver. For this reason I would recommend using 100000 or 400000 as baudrate values. The default is usually set to 100000.
I successfully used 400000 with an OLED display module to increase the rate at which images could be updated.
No tags for this post.

